
⚙️ Tech/DB
[MongoDB] 웹에서 입력받은 데이터 저장 (웹 연동)
fiftyline
2025. 5. 15. 18:07
html 폼 입력값을 MongoDB에 저장하는 프로세스 예시
0. 폴더 구조
아래 폴더 구조를 기반으로 세팅합니다.
addressbook_app/
├── app.py
├── templates/
│ ├── index.html
│ └── result.html
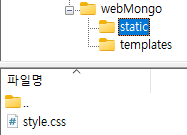
├── static/
│ └── style.css
1. 디렉토리 만들기
mkdir webMongo
cd webMongo
mkdir templates
mkdir static
cd ..
sudo chmod -R 777 webMongo
2. 파일생성
app.py
더보기
from flask import Flask, render_template, request, redirect
from pymongo import MongoClient

app = Flask(__name__)

# MongoDB 연결
client = MongoClient("mongodb://localhost:27017/")
db = client["addressbook_db"]
collection = db["contacts"]

# 홈 페이지 - 입력 폼
@app.route('/')
def index():
    return render_template("index.html")

# 주소록 저장 처리
@app.route('/save', methods=["POST"])
def save_contact():
    contact = {
        "name": request.form["name"],
        "phone": request.form["phone"],
        "email": request.form["email"],
        "address": request.form["address"],
        "tags": request.form.getlist("tags")
    }
    collection.insert_one(contact)
    return redirect("/list")

# 저장된 주소록 리스트 출력
@app.route('/list')
def contact_list():
    contacts = list(collection.find())
    return render_template("result.html", contacts=contacts)

if __name__ == '__main__':
    app.run(debug=True, host='0.0.0.0', port=5001)
index.html
더보기
<!DOCTYPE html>
<html lang="ko">
<head>
    <meta charset="UTF-8">
    <title>주소록 입력</title>
    <link rel="stylesheet" href="{{ url_for('static', filename='style.css') }}">
</head>
<body>
    <h1>📬 주소록 등록</h1>
    <form action="/save" method="POST">
        <label>이름:</label><input type="text" name="name" required><br>
        <label>전화번호:</label><input type="text" name="phone" required><br>
        <label>이메일:</label><input type="email" name="email"><br>
        <label>주소:</label><input type="text" name="address"><br>
        <label>태그:</label><br>
        <input type="checkbox" name="tags" value="친구"> 친구
        <input type="checkbox" name="tags" value="가족"> 가족
        <input type="checkbox" name="tags" value="회사"> 회사<br><br>
        <input type="submit" value="저장">
    </form>
</body>
</html>
result.html
더보기
<!DOCTYPE html>
<html lang="ko">
<head>
    <meta charset="UTF-8">
    <title>주소록 목록</title>
    <link rel="stylesheet" href="{{ url_for('static', filename='style.css') }}">
</head>
<body>
    <h1>📄 저장된 주소록 목록</h1>

    <table border="1" cellspacing="0" cellpadding="8">
        <thead>
            <tr>
                <th>이름</th>
                <th>전화번호</th>
                <th>이메일</th>
                <th>주소</th>
                <th>태그</th>
            </tr>
        </thead>
        <tbody>
            {% for contact in contacts %}
            <tr>
                <td>{{ contact.name }}</td>
                <td>{{ contact.phone }}</td>
                <td>{{ contact.email }}</td>
                <td>{{ contact.address }}</td>
                <td>{{ ", ".join(contact.tags) }}</td>
            </tr>
            {% endfor %}
        </tbody>
    </table>

    <br>
    <a href="/">← 다시 등록하기</a>
</body>
</html>
style.css
더보기
body {
    font-family: Arial, sans-serif;
    padding: 30px;
    background-color: #f2f2f2;
}

h1 {
    color: #333;
}

form {
    background-color: #fff;
    padding: 20px;
    border-radius: 10px;
    width: 400px;
    box-shadow: 0 0 10px rgba(0,0,0,0.1);
}

input[type="text"], input[type="email"] {
    width: 100%;
    padding: 8px;
    margin: 5px 0 10px;
    box-sizing: border-box;
}

input[type="submit"] {
    padding: 10px 20px;
    background-color: #3498db;
    color: white;
    border: none;
    cursor: pointer;
}

ul {
    list-style: none;
    padding: 0;
}

li {
    background: #fff;
    padding: 10px;
    margin-bottom: 8px;
    border-radius: 5px;
}

/* 📌 테이블 추가 스타일 */
table {
    width: 100%;
    border-collapse: collapse;
    margin-top: 20px;
    background-color: #fff;
    box-shadow: 0 0 10px rgba(0,0,0,0.1);
    border-radius: 10px;
    overflow: hidden;
}

th {
    background-color: #3498db;
    color: white;
    padding: 12px;
    text-align: left;
}

td {
    padding: 12px;
    border-top: 1px solid #ddd;
    color: #333;
}

tr:hover {
    background-color: #f9f9f9;
}
3. 파일 업로드
해당 위치에 app.py, index.html, result.html, style.css파일을 업로드합니다.
업로드가 되지 않는다면 권한이 열리지 않은 것일 수 있으므로 1번 과정의 권한설정이 누락되었는지 확인합니다.


4. app.py 실행
터미널에서 해당 위치(webMongo)로 이동해 app.py를 실행합니다.

5. 웹 접속
app.py를 실행시킨 상태에서 (외부IP:포트번호)로 접속합니다.

6. DB 확인
데이터를 입력 후, 새로운 터미널을 열어 DB를 확인해봅니다.
mongosh
test> use DB명
DB명> db.컬렉션명.find()